Showing posts with label dessert. Show all posts

Monday, April 18, 2011

Easy Passover Desserts

Oh, did you forget tonight was Passover?  You forgot you were supposed to bring a dessert to your friend's/coworker's/cousin's/mother-in-law's house?  Oh you're supposed to bring a dessert and you don't have like an extra 6,000 eggs lying around, and matzah cake meal?

Do not worry.  Walk away from the bakery counter.  Matzah Toffee to the rescue!

The ingredients are simple, and because its basically sugar, butter and chocolate (and your creativity) it is hard to go wrong.  And you can get ready at the same time!

Ingredients:
5 sheets of matzah
1/2 stick of butter
1 cup of brown sugar (light or dark)
1 cup of chocolate chips
1/4 teaspoon vanilla extract
pinch of salt

Cover a cookie sheet in tin foil, and lay out the matzah.  

In a medium size sauce pot, over low heat, melt the butter and then add the brown sugar.  While stirring constantly, watch for the sugar to melt into the butter.  When it starts to bubble remove from the heat.  Off the stove add the vanilla, or other extract that you might like - or none at all, and the salt, and continue to stir.

With a heat-proof spatula spread the toffee mixture on top of the matzah getting as close to all four corners as possible.  

Put the entire tray into a warm oven of 250 degrees for 10-15 minutes. (Take a shower).

Out of the oven, sprinkle chocolate chips onto the hot toffee'd matzah and then tent the entire tray with tin foil and let it sit for 15 minutes.  When tented the heat will melt the chocolate and you're free to do other things.  (Go do your make up).

Come back to the matzah and spread the chocolate with a knife or spatula and then be creative, sprinkle with a little sea salt, some chopped pistachios or almonds, or candied ginger.

Put the tray in the refrigerator for 30 minutes, or longer.  (Dry your hair). When you're ready to go, break into candy bar sized pieces.

Enjoy with family and friends - this sweet treat is perfect as a Passover dessert, hosting gift, or a quick snack.

Happy Passover!

Friday, December 10, 2010

Baked Donuts, a Delight for the Holiday Season

There are two "traditional" Hanukkah foods: latkes (fried potato pancakes) and sufganyot, (donuts, fried dough balls).  This doesn't really add up to the healthiest food choices.  For our Hanukkah party last weekend I knew I couldn't skimp out on traditionally made latkes, but donuts...  that I could tweak.  

I scoured the Internet for baked donuts, with ingredients that I had on hand and I lucked out with a recipe from Piece of Cake.  This rules out any recipe that calls for buttermilk powder, shortening, etc.  Which means, you probably have these ingredients too, and because they are baked and not fried you might want to enjoy this less guilty treat after Hanukkah, or Christmas morning.

Baked Donuts Ingredients
For the dough:
1/2 cup + 3 tbsp warm milk, 95 to 105 degrees
1 1/8 teaspoons active dry yeast
1 tbsp melted unsalted butter
1/3 cup sugar
1 egg
2 1/2 cups all purpose flour
1/8 teaspoon nutmeg
1/2 teaspoon kosher salt

Topping:
3 tbsps of unsalted butter
1/3 white sugar
1 tbsp cinnamon

So here is the thing, this recipe can look pretty intimidating.  It has yeast, it has a specific measurement for milk, yikes.  But here is the truth.  I made this recipe without a rolling pin, while preparing and serving a Hanukkah meal for 8 and with three adorable kids running around, in other words - these pictures, not so hot - but the donuts, out of this world.

Pour the yeast in the base of your Kitchenaid Mixer, or a large bowl, and then add 3 tbsps of the warm milk.  I used a thermometer to get this just right, and its important - in this case baking is more like delicious chemistry, than playtime.


While the warm milk and the yeast are dancing and expanding and doing their magic, you are melting some butter and combining it with the rest of the milk and the sugar.  Allow the yeast and milk to get to know each other for about five minutes, no less but, more is okay.  Then add the butter/sugar/milk combination to the mixer.

Now, in a separate bowl, combine the flour, salt and nutmeg and slowly pour the dry ingredients into the mixer all while mixing with the paddle on a low speed (I used 2).  Add one egg and let that continue to incorporate.  When the flour is fully mixed in, should take 3 minutes or so, remove the paddle mixer and attach the dough hook.


Let that hook do its work for a few minutes and pull the dough from the bowl and put some of your own muscle into it.  Sprinkle some flour on your workspace and knead the dough into a soft, smooth ball.  Place the ball into an oiled bowl and wrap the bowl with plastic and tuck it away into a warm space for at least an hour.

I did this at 11am, when family arrived at noon.  After about an hour roll the dough out to about 1/2" thick and cut your donuts.  You do NOT need fancy tools.  I used a juice glass for the big rounds and a shot glass for the holes.  Once the donuts are all cut, cover with a clean kitchen towel and tuck the pan away for another 45 minutes.

After 45 minutes your donuts are soft, puffy and are ready to bake place them in a 375 degree oven for 8 - 10 minutes.  They should have a very soft golden glow, mine were very soft gold, but that just added to their super soft chewiness.


While the donuts are baking, melt three tablespoons of butter.  When fully baked dip each donut (top and bottom) into the butter mixture and then into the sugar and cinnamon mixture.


Yes, your fingers will get messy, and yes you will have used a lot of utensils and bowls, but you know what will also happen?  The twelve awesome donuts that you made will disappear, and your niece will return again and again to the table seeking out one more bite.  I think they even beat Dunkin'.

Tuesday, October 5, 2010

First taste of Fall: Dark Chocolate Chunk Pumpkin Cookies

Not too long ago I listed my favorite things about fall, and somehow this got left off the list - very tragic!  I found this recipe last year and made it for my office, and it was a big, big hit.   Pumpkin is a fall mainstay and one that I very much enjoy.  Growing up a favorite smell and surprise was the aroma of a freshly baked pumpkin bread in my mom's kitchen, which I really should get the recipe for.  

In the meantime, we'll have some cookies, Dark Chocolate Chunk Pumpkin Cookies

Dark Chocolate Chunk Pumpkin Cookies
Ingredients, adapted from Big Fat Cookies by Elinor Klivans
1 cup whole wheat flour
1 cup white flour
1 ½ tsp baking powder
1tsp baking soda
½ tsp salt
1 tsp ground cinnamon
¼ tsp of nutmeg
¼ tsp of pumpkin pie spice
2 eggs
1 cup of sugar
½ cup of canola oil
1 cup of pure pumpkin, pureed
1 tsp of vanilla
1 cup of dark chocolate chips (or not, totally up to you)
Set Oven to 325 degrees

In one bowl lightly beat the sugar and eggs for a light golden color and slightly frothy texture.  Add to the eggs and sugar the oil, vanilla and pumpkin puree. 


Add to the wet ingredients the white flour and whole wheat flour, baking soda and powder and all of your spices and seasonings.  It will smell like fall, right there in the bowl.  Remember the uncooked eggs?  Don't try the batter yet.


Did you notice that there is more baking powder that is normally required for most cookie recipes?  This makes the batter extra airy and fluffy.  You'll notice this difference in texture as soon as you mix it up.


Orange, pumpkin scented, and delicious...  What is missing?  Chocolate!  Pumpkin is a must for fall, but in our house chocolate chips are a year round staple.  I make no apologies for this confession, besides it is dark chocolate - that has to count as being on the healthy side of the aisle.  I suppose if chocolate isn't your thing, which is shocking in and of itself, you could swap in nuts, or a blend of raisins, or dates?  


I use a large spoon to scoop these out and bake them in a 325 degree oven for 15 minutes.  As I mentioned, these cookies bake up extra fluffy and high as opposed to baking and spreading on the pan, so no need to worry about crowding the pan. 


When the cookies are out of the oven, these are the critical next steps: find a sweater (to my Florida readers, maybe a light cardigan?), find a cool breeze, a cup of cider/tea/coffee/chai and share with someone you love.  Cookies and cake are delicious, but when you eat them with someone you love, wow, the flavor is x 1000.

Happy Fall!

Monday, September 13, 2010

Everybody's Favorite, with a Holiday Twist

And, I'm back!  Sorry for the absence of postings last week, Mark and I were India - more on that soon, with a travel journal and lots of pictures.  In the meantime, let's get back into the swing of things with an easy, and perfectly delicious recipe.

Like apples and honey, pomegranate seeds are also a symbolic treat for the Jewish High Holidays of Rosh Hashanah and Yom Kippur.  Tradition dictates that you try a new/exotic fruit, which for many a pomegranate qualifies, and also the abundance of tiny pomegranate seeds is symbolically linked to an abundance of goodness in the New Year.  


Image via Vos Iz Neias?
 While working on the whole wheat apple muffins, I thought this would be a fun way to incorporate some extra goodness into the holidays.


Pomegranate Cookies, adapted from Nestle Tollhouse

Ingredients 
1 and 1/8 cups all-purpose flour
1/2 teaspoon baking soda
1/2 teaspoon salt
1 stick butter, softened
3/8 cup granulated sugar
3/8 cup packed brown sugar
1/2 teaspoon vanilla extract
1 large egg
1/2 cup of fresh Pomegranate Seeds
1/2 cup of Chocolate Covered Pomegranate Seeds
Set the oven to 350 degrees, and bake for about 8 minutes or until browned.

Just like you were making regular chocolate chip cookies, cream the butter and sugars, add the egg and vanilla.  Then add the dry ingredients of flour, baking soda and salt.  


Then add the fresh pomegranate seeds.  You could also you dried seeds, but I found the fresh ones kept the cookies unbelievably moist.  You could stop with the fresh seeds for a healthy, sweet treat, but come on, how could I resist not adding in dark chocolate covered seeds as well?  Dark chocolate is rich with antioxidants, so that counts too!


I found the fresh seeds and the chocolate covered seeds at Trader Joe's, but if you're not so lucky to have a Trader Joe's nearby, you could just use regular chocolate chips and remove the seeds yourself.  To avoid a mess you can open up the pomegranate and pull out the seeds with your hands and the fruit submerged in a bowl of water.

For these cookies I used a teaspoon sized scoop.  The cookies came out to be size of an Entenmann's cookie, which is pretty much the perfect 2-bite size. 


Eat and enjoy, and share with a friend.  Wishing you all great things for fall and the start of the New Year!

Thursday, September 2, 2010

The New Banana Split

I like cookies, brownies, cakes (in slices and in cups) but sometimes, I want to take a break from the butter and sugar, and eggs and go a little bit more natural.  By natural, I don't mean baking with agave or honey, which I have done, or using whole wheat flour, which I do more and more, I mean just eating fruit.

This summer we have reaped the benefits of living within walking distance to a farmers' market and enjoying peaches, blueberries, strawberries and melon by the bowlful.  But, this dish, this changed it all.  Let me introduce you to banana ice cream, which I found on The Kitchn, made with just bananas.
 
The bananas that are currently sitting on your counter top that are getting more and more freckles each day?  That is your only ingredient. Depending on the desired serving size, I have found 2 bananas enough for 3 people - but it's just banana so there's no downside in eating a lot!


Cut the bananas up into 1/2 inch slices and throw them in the freezer for at least 2 - hours.  I recently froze mine for 24 hours, and that was fine too.  The more frozen the better.


After they bananas slices are thoroughly frozen dump them all into your blender/food processor and go.  At first the bananas will look gravelly, and hard, and chunky, and not at all ice creamy -although my sister did point out that it resembled Dippin' Dots, everyone's local mall's version of the ice cream of the future. 

No matter... Press on, keep grinding, and occasionally pausing to scrape down the sides with a spoon.  In a matter of moments, seriously 3-4 minutes tops, the banana gravel becomes beautiful whipped banana ice cream.


Now you can eat it right now in a bowl (or out of the mixer) if you want, and it is amazing.  Or you can add additional flavors.  Some favorites in my house right now are a teaspoon of chunky peanut butter, honey, or cinnamon, but why not some coconut flakes (if you like that, I don't), or some cocoa powder, or chocolate syrup?

So far this hasn't lasted past dessert, because we eat it all so quickly - but I would eat it for breakfast, or serve it with warm waffles/pancakes/french toast.  I need a brunch party, stat!

Monday, August 23, 2010

Less Sweet Sweet Stuff

To work in my office is to experience a constant parade of sweets.  They come in all shapes, store bought treats from a coworker's vacation, classic baked goods from a family baking adventure, ice cream parties to celebrate jobs well-done, and everyone's favorite, snack on Friday.

On one particular day my office had an extra large Pineapple Upside Down Cake, Chocolate Bombe cake (that was nearly a foot tall), and Ben and Jerry's Make Your Own Sundae in the lobby.  After partaking and indulging that afternoon I decided to start skipping the sugar, or at least be more selective.  I've since realized that having it less often really does make it more of a treat.  Have no fear, sugar isn't banned - I have enjoyed a few s'mores since our fiesta - I had to make sure their deliciousness wasn't a fluke.  It wasn't!

Cutting back on traditional sugar though didn't mean I was cutting back on baking.  Looking in my refrigerator for inspiration I found these carrots.  They were too soft to dip, it's still too hot to consider roasting root vegetables, so obviously there was no better place for them that in a cookie!


Sugar Free Carrot Cookies
Ingredients:
¾ Cup of Whole Wheat Flour
½ Cup of Cake Flour
1 Cup of Whole Oatmeal (dry)
1 tsp of baking powder
A dash of sea salt

1 Cup Shredded Carrots
½ Cup of Olive Oil
½ Cup of Maple Syrup
Spring of fresh grated ginger


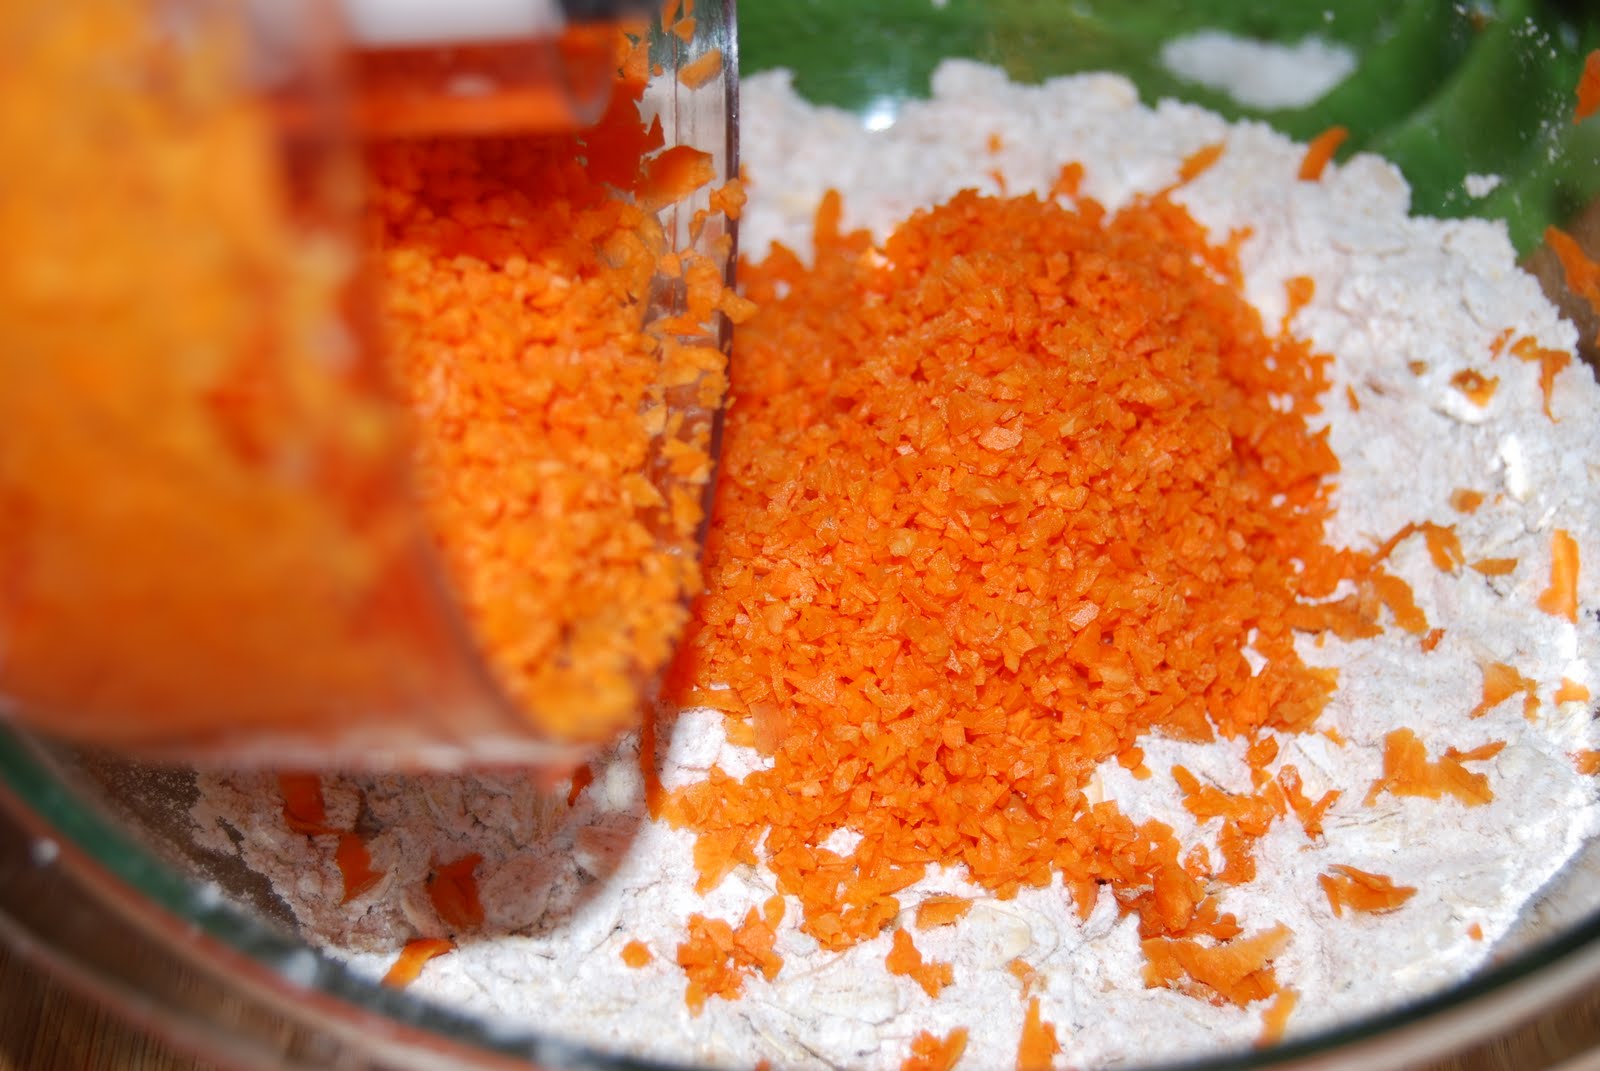
First mix all of the dry ingredients (flours, oatmeal, baking powder, and salt) and then pour in the shredded/grated carrots.  (You can decide how finely grated you want your carrots to be, but keep an eye on them, you do not want carrot juice.)  You can mix these all with a fork, or have one less thing to wash and mix it with your fingers (that's what I did).


Then pour in the wet ingredients (oil and syrup).  We're you going to plug in your mixer?  You can skip that to.  I used a soup spoon to mix this together - a soup spoon!  Nothing is easier than that.


Then just roll them out into little balls, about the size of a tablespoon.  I used a Silpat mat on one sheet and a piece of tin foil on the other.  The tin foil cookies' bottoms were darker, some might say a bit on the burnt side, but they still got rave reviews - I think the extra color caramelized that sugars in the syrup.  Either way, I don't think you can go wrong.


When they are out of the oven you are going to want to eat them all.  We did do that, so I speak from experience.  They are delightful plain, but they are decadent with a little swipe of cream cheese. These made a terrific guilt-free mid-week dessert, and I can foresee them making an appearance at future brunches and snacks.


Friday, August 20, 2010

Classic, with a Kick

Earlier in the week I mentioned our Latin inspired fiesta, and our large menu.  I knew when planning the menu that as always we would have a lot of food, and I wanted to keep everything light, easy to prepare and fun.  So, while I love tres leches and flans, I knew they would work with the rest of our hand held menu, and goal for being outside.

And that was when Mexican S'mores were born.    
 

Of course I originally intended to make my own graham crackers, I even thought about making my own marshmallows, but as you might imagine those plans don't jive with "easy to prepare".  So what is more easy to prepare than a box of graham crackers, a bag of marshmallows and 2 packets of Lindt Dark Chocolate with a hint of chili?  I'll tell you what's easier, just about nothing!  

What I had envisioned was using our grill to gently toast the marshmallows to a lovely golden brown.  Instead it rained all day and the cooking and s'mores making moved inside.  

No fear, these are just as good when they are made in the oven.  

Steps to S'more Success:
1. Preheat oven to 500 degrees
2. Put foil on top of a baking sheet
3. Put marshmallow on top of chocolate square on top of half of a graham cracker
4. Place in oven, with the light on and pace/dance/chat for about 90 seconds because then the marshmallows will be soft and browning.
5. Stack graham cracker half on top.
6.EAT!, and eat again and again.

I think other delicious flavors would include those Ghirardelli squares with a little mint, caramel or peanut butter filling - the options are endless and the results are deliciously fun!

Monday, August 16, 2010

Melon Lemon - A Good Mix

So, this isn't really a recipe - but it is a must, must, must do.  

See that bowl of watermelon you chopped up the other day?  It's sitting in your refrigerator.  Maybe you grab a few pieces every now and then as a refreshing snack.  Oh, you don't have a gigantic bowl of watermelon in your fridge?  Can you please go get one?  It's a primary ingredient in this non-recipe recipe.

Continuing on...  Remember how you bought a bag of lemons for homemade lemonade, or to throw in a bottle of Corona (depending on the type of weekend you had)?  Take that lemon, cut a wedge and squeeze all of the sour, lemony juice over the chunks of watermelon.  

That little squirt transforms the watermelon.  No joke, like Cinderella style, a "She's All that That transformation.  The watermelon is no longer simple, juicy fruit, it is now exotic, tart, and full of flavor.  The natural sugars concentrate and it's like you're eating chunks of summer, if your summers are spent on the beach in Mexico. 


I have to give credit where credit is due.  This trick - which pretty much changed the watermelon eating portion of my life - came courtesy of my sister's boyfriend's housemate.  And now you have it via me.  You can tell your friends you learned this from your favorite blogger's sister's boyfriend's friend. 

Thursday, August 12, 2010

Plum and Peach Crumble

When I woke up this morning (late) it was as though I was back in Florida for a hurricane!  At 7:30 the sky was dark, the trees were blowing and lightning was striking all around the house, and I wish I had this for breakfast...


A week or so ago I had lots of peaches from the farmer's market, and a LOT of plums from Costco and they were just shouting out to me, "mix us with the good stuff!" and so I did. 


Plum and Peach Crumble:
Ingredients:
5 peaches, peeled
6 plums, peeled
1/2 tsp of corn starch
1 tbsp brown sugar
3/4 cup whole wheat flour
1 tbsp of white sugar (I grabbed the flour bag by mistake in the picture)
3/4 cup plain oatmeal
5 tbsps of butter
A sprinkle of slivered almonds
A dash of cinnamon

First bring a saucepan to boil and dip the plums and peaches in the hot water for about 20 seconds and then plunge them into their ice cold water bowl.


Then peel the skins right off.  See the white flecks on the plum?  That's a vegetable wax that was applied to the fruit - removing the skin means no weird white spots.  You can do this with your fingers, but do it gently, especially with the softer fruits.

Then cut the fruit into large chunks.  This is really based on preference but I like to have big fruit bites.  Because I am really into cinnamon I sprinkled a bit on, but you could easily skip it.  This is also when I pore in the corn starch, which magically (not really, this is what it is supposed to do) firms up the juices from the fruits to make a more solid crumble/pie/tart.

In a separate bowl I mixed by hand the sugars, the whole wheat flour, oatmeal and butter.  The butter adds just the right amount of moisture, so a still fairly light crumble topping.  If you're looking for a more traditional, or more solid crumble I'd add more flour and an egg.  But since I was going for a lighter dessert, I kept it simple and poured it over the fruit in the pie pan.


Then I baked it at 350 degrees for about 30 minutes, or until the top was nice and browned and the juices were bubbly.  Tip: if you want it to be browner, but not burnt take another tablespoon of butter and break up small chunks for on top. 

 The toughest part was waiting for it to cool...  So we waited, and waited, and then stopped waiting.  

This was delicious warm, and would have been great on top of vanilla ice cream, or with whipped cream but then I guess that whole healthy dessert concept would be out the window.  I would also serve it room temperature at a brunch, or having it for breakfast with some Greek yogurt.

Fruit this summer has been delicious on their own, but sometimes it's fun, if you're going to spend time washing and slicing to throw them into a pie pan too!

Tuesday, August 3, 2010

Just want Chocolate

For the past few baking posts I've shared recipes that starred peaches and blueberries, the bounty of our Farmer's market.  But, you know what is always in season?  Chocolate.  Sometimes chocolate like to be eaten straight from the wrapper, but sometimes it wants to get dressed up and be a star and this cake lets it be the star.

Chocolate Bundt Cake with Vanilla Frosting

Ingredients for Cake:
1 cup chocolate chips
1/2 cup (1 stick) butter, softened 
1 cup boiling water
2 cups all-purpose flour
1-1/2 cups sugar
1/2 cup Hot Chocolate Powder
2 teaspoons baking soda
1 teaspoon salt
2 eggs
1/2 cup Greek Yogurt, 0%
1 teaspoon vanilla extract

Heat oven to 350°F. Butter and flour a standard bundt pan.

Combine in a medium sized bowl the chocolate chips and softened butter, and stir in the boiling hot water.
Blend together until the chocolate, butter and hot water make a silky chocolate soup.

In a separate bowl combine flour, hot chocolate powder, baking soda and salt and gradually blend in the chocolate soup.  

Then add the eggs, yogurt and vanilla and continue to blend, and pour into the prepared bundt pan.
I retained a little bit of the batter for 4 cupcake sized portion since we had friends over, and I wanted to taste test the new recipe, so I only baked it for around 40 minutes, even though the recipe calls for 55 to 60.  I would recommend checking at 40 minutes with the toothpick trick and then extending for five minutes and checking again.

After baking, let the cake cool in the pan for at least ten minutes, and then invert on a plate and if time allows continue to let cool.  I made my cake the night before a family party and made the glaze the morning of, but I am sure they could all be done the night before and would stay beautiful and delicious.

Ingredients for Glaze:
1/2 stick of butter
2 cups of powdered sugar
1 teaspoon of vanilla extract
2 - 3 tablespoons of hot water

This might be the most simple, most delicious frosting.  I think  you could be creative and add food color, or other flavor extracts (almond, mint, liquor, lemon, etc), but I kept it simple.

Melt the butter and gradually stir in the powdered sugar, water and vanilla.  

 Beat by hand with a whisk until smooth, adding more water a teaspoon at a time if you're finding it too thick, or lumpy.   This makes more than enough glaze - so maybe you'll lick the whisk, or share with a friend!


Pour a generous amount all around the cake, in any free form design.  I think with a cake this classic it doesn't need to look "too perfect".   I added some plain slivered almonds for fun - and crunch.  

Cut a big slice and enjoy!  This cake is sweetened with the sugar and chocolate chips, but not too sweet with the balance of the yogurt.  I think you could tweak this recipe with nearly anything you had on hand.  It's so moist you don't need anything else, but that doesn't mean you wouldn't love it with a scoop of vanilla ice cream!